J.P. Carpet and Tile Care is thrilled to be teaming up with one of our very favorite bloggers of all time... Jen from Tatertots and Jello! Welcome TT and J readers! If you're NOT familiar with Jen or her blog, then you are seriously missing out! I met Jen a couple of years back when I first started my family blog. She quickly became one of my favorite people.
TT and J is full of fabulous DIY project ideas, recipes, crafts, and all other sorts of fabulousness for your home. Something else that goes on over there? GIVEAWAYS!! And that's what we've teamed up for today!
Jeremy recently did some carpet and tile cleaning for Jen, and now together we'd like to offer a chance for YOU to have carpet or tile cleaning done absolutely FREE! If you're here from TT and J, well you know what to do! If you'd like to see what Jen thought of our work, and find out how you can enter to win FREE carpet or tile cleaning, just click here!
Good luck! I hope you win!
Saturday, August 20, 2011
Monday, August 1, 2011
Thrifty Decorating - $200 wall art for under $20!
Around here, one of my favorite hobbies is finding ways to enhance my home for less. That's what I love about the blogging world, there are so many great ideas right at your fingertips!
I first saw this idea over at one of my very favorite decorating blogs, Thrifty Decor Chick. The project is inspired by this set of Ballard Designs wall plaques:
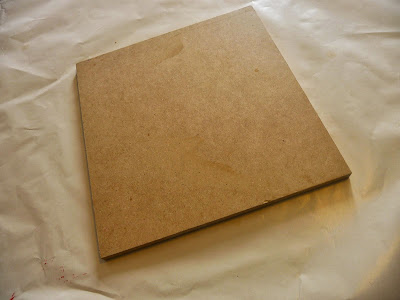
1. Start out with 1/2 inch medium density fiber board (MDF), cut into 12"x12" squares. Home Depot cut it for me. I used 9 squares.
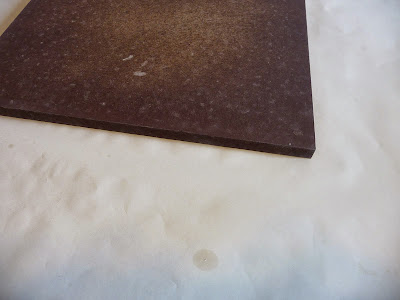
2. Spray paint the edges of your MDF board. I used Rustoleum Espresso Brown.
3. Select a variety of scrapbook papers and adhere to your squares with Mod Podge. I have generally been able to be relatively wrinkle free with my projects, but this large surface proved to be a challenge...the first few squares I did looked terrible! But I snooped around and snagged some tips from other bloggers, and I had much better luck this time! Put MP on the back of the paper and on your hard surface, then use a straight edge (like an old credit card - thanks for the tip Jen) to smooth out all the bubbles. Let dry before adding MP over the top of the paper.

4. Let boards dry completely.
5. Once dry, flip your boards over and use an X-acto knife to trim any paper edges that are overlapping.

6. Hang on your wall and enjoy the compliments! Mine are nailed right into the wall so they are flush with the wall and perfectly even.
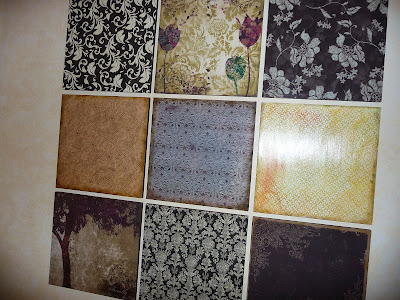
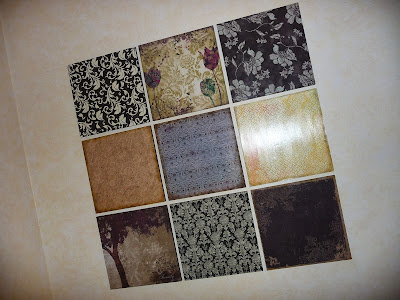
I spent $16 for the MDF board, and I already had the spray paint and scrapbook paper. And I always, ALWAYS have Mod Podge on hand. However I recently ran across a recipe for homemade Mod Podge that I want to try - because you know I'm all about the thrifty!
Do you have any great thrifty decorating tips to share?
I'm excited to announce that this month someone will win a FREE whole-house carpet cleaning! Keep watching for the official announcement with all the details - make sure to follow us on Facebook to receive all the updates!
I first saw this idea over at one of my very favorite decorating blogs, Thrifty Decor Chick. The project is inspired by this set of Ballard Designs wall plaques:
Isn't it pretty? For a mere $200.00 you can have it!
OR
You can create your own version for a fraction of the price!
Sara over at Thrifty Decor Chick used scrapbook paper and spray adhesive, however my very favorite medium for creating inexpensive decor for my home is Mod Podge, so I used it instead of spray adhesive - here's how I did it:
1. Start out with 1/2 inch medium density fiber board (MDF), cut into 12"x12" squares. Home Depot cut it for me. I used 9 squares.
2. Spray paint the edges of your MDF board. I used Rustoleum Espresso Brown.
3. Select a variety of scrapbook papers and adhere to your squares with Mod Podge. I have generally been able to be relatively wrinkle free with my projects, but this large surface proved to be a challenge...the first few squares I did looked terrible! But I snooped around and snagged some tips from other bloggers, and I had much better luck this time! Put MP on the back of the paper and on your hard surface, then use a straight edge (like an old credit card - thanks for the tip Jen) to smooth out all the bubbles. Let dry before adding MP over the top of the paper.
4. Let boards dry completely.
6. Hang on your wall and enjoy the compliments! Mine are nailed right into the wall so they are flush with the wall and perfectly even.
I get more compliments on this wall art than any other thing in my home.
I spent $16 for the MDF board, and I already had the spray paint and scrapbook paper. And I always, ALWAYS have Mod Podge on hand. However I recently ran across a recipe for homemade Mod Podge that I want to try - because you know I'm all about the thrifty!
Do you have any great thrifty decorating tips to share?
I'm excited to announce that this month someone will win a FREE whole-house carpet cleaning! Keep watching for the official announcement with all the details - make sure to follow us on Facebook to receive all the updates!
Labels:
carpet cleaning,
DIY,
helpful info,
thrifty decorating,
tips and tricks
Subscribe to:
Posts (Atom)


